Your emergency water storage needs to be addressed on a regular basis. Simple questions like how much your emergency water storage should cost, what containers to use, and how to purify the stored water need to be answered. Here are my answers to those questions and more.
Emergency Water Storage: Duration
Do you live in a bone-dry, hot, desert? Then your emergency water storage strategy may differ from someone who lives near a well, lake, river or reservoir.
The same is true if you live in a third-floor city condo, compared to a quarter-acre in the burbs or 25 acres in the boondocks. You want to build your emergency water storage capacity around your situation. That’s it.
Your situation is unique. There are already tons of barriers when it comes to water storage. Don’t beat yourself up about what Joe Shmoe in Alamo is doing. Focus on yourself. You have enough hurdles to get over.
For example, I’ve discussed some of my water storage ideas with someone special in my life, but no way is that ugly blue barrel going near the garden. Another reason to get the “family” involved in your project. Talking it out clears your thinking so to speak.
Don’t Rush Your Emergency Water Storage Plan: It’s a Process
In developing your plan, remember, there’s no rush to this water storage deal. It takes time and it takes a lot of forethought. It’s a process, one you’ll revisit on a regular basis even after you’re set-up. Storage is only the beginning. Try to act with a sense of urgency every day and it will help you stay out of the “do nothing” state.
A word of caution. It’s easy to start clicking away on Amazon and end up with a pile of cool stuff that doesn’t fit into a cohesive plan. For example, you want to have storage, and purification, and ease of use. A LifeStraw filter should be part of the mix. But sipping water out of a puddle in your driveway might not be the solution for two weeks of no water.
You’re Already Ahead of the Pack
The simple fact that you’re reading about emergency water storage puts you ahead of the pack. Believe me, it takes work to figure this stuff out for your family. My goal is to share with you what I’ve learned to help you create your own plan. I’ve broken my water plan into three phases: short, intermediate, and long-term storage.
-
Short-Term
Short-term needs are immediate and can last anywhere from 2 hours to 3 days. In some situations, you may have some time to prepare, such as for a storm. But I’m thinking about a short-term emergency that catches you off guard. Imagine, right now, if you lost your main source of water. How would you fare for the next couple of days? You don’t want to be the one waiting in line at the store. You don’t want to be told that there are no more water bottles. The solution for short-term water needs is to simply make sure you have enough water on hand now for the next couple of days. I like having a number of options here including:
- small water bottles
- pints of water
- gallons of water and
- larger containers (2.5 gallons or 5 gallons)
This is the easy stuff. You don’t have to worry about purifying the water. You can basically get any of it at Walmart or Amazon. And if you don’t use it within the next year or so then cycle through it and replenish. The idea is to try to make this as affordable as possible. But this is an area that deserves your investment.
-
Intermediate-Term
Next, I’m thinking about water storage for the next couple of weeks or the intermediate-term. Here are the numbers. At a minimum, you want to have at least one gallon per day per person to be able to survive in relative comfort. A gallon will provide two quarts for drinking and two for light sanitation and cooking. But my thinking is, if you’re going to store water, why not be on the safe side? In places that are hot and muggy like Houston and Florida, you’ll need to have it, as I explain below. For my family of four with a dog and a cat, my target is fifteen gallons per day or 220 gallons for two-weeks.
-
Long-Term
Finally, my long-term goal for water storage isn’t really storage. It is to use natural resources such as a river or water reservoir. If you don’t have access to a natural resource or a well, then you want to store as much as your physical property will allow. This is where you need to simply do as much as you can to improve your situation.
Emergency Storage Water Requirements
Don’t miss an opportunity to improve your situation when it comes to water. You simply cannot afford to be without it. Beyond three days, give or take, you simply won’t live. That’s why I suggest a short-term solution by simply making sure you have enough water on hand for the next couple of days, and then work from there. You’d be surprised at what you already have, as I explain below. But how do you prepare for when you will be without water for longer than a few days?
In thinking about intermediate-term emergency water storage solutions, I’m preparing for two weeks. I’ll explain why in another post, but for starters let’s figure out your water needs. The average person needs two quarts of water per day to simply survive. That two quarts does not include cooking, sanitation or physical exertion. Basically, it’s not going to improve your situation much beyond staying alive long enough for help to arrive or hope for some luck.
Hope is Not a Strategy
But as you all know, hope is not a strategy.
My feeling is, you’re best off storing 3 gallons per person per day. That means a family of four with a dog will need just over 200 gallons for two weeks. It sounds like a lot, I know. But it’s also worth noting that the average person uses 70 gallons per day. That’s roughly 280 gallons per day for a family of four not including pets. And yes, a lot of this is from showering, but you get the point.
Water You’ve Already Stored for the Next Disaster
The first thing you want to do when it comes down to your water supply is to figure out your water sources. For example, we have town water and we live near a freshwater reservoir, but it’s at the bottom of a steep hill. It will be extremely difficult to gather water and carry it up the hill. But it can be done in small batches.
Next, you want to determine how much water you have on hand right now. The first place to look is your hot water heater capacity. Go online to see how to access water from your hot water heater in an emergency. Here’s a general sequence:
- turn off the electricity or gas to your hot water heater
- close the supply valve to the tank to preserve the quality of the tank water
- locate the valve at the bottom of the tank
- turn on the hot water at your kitchen sink to allow airflow
- attach a short hose or place a pan under the hot water tank valve
- open the valve
If there’s sediment don’t throw the water away. Simply strain it. And always boil the water to purify it.
Also, consider that there are a few gallons of water stuck in the pipes in your house. You can access this before you empty the hot water tank by simply collecting it in a container in your sink. Another source is the water in the tank behind your toilet assuming there’s no toilet cleaner.
The Cost of Emergency Water Storage
Please note, prices for water storage solutions have been all over the map in my research. Some prices are ten times what they should be because of increased demand from recent natural disasters. For example, I like the AquaPodKit for emergency water storage. It’s a 65-gallon one-time use, plastic liner for your bathtub that you fill before a storm. It’s back-ordered here for a reasonable $23.95. I’ve ordered one and who knows when I’ll get it, but stay away from the retailers selling it for $300.
You’re making progress. How to store water isn’t easy. It requires your attention. But you can do this because without water you’re toast in three days.
Do Not Get Overwhelmed
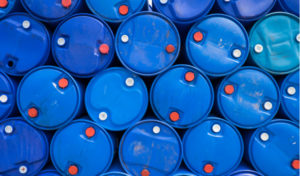
Don’t get overwhelmed. There’s an endless combination of ways to store water for short, intermediate, and long-term needs. Focus for a moment on a two-week supply or an intermediate-term storage solution. I’ve chosen four fifty-five-gallon barrels.
These barrels aren’t small. Imagine those big-yellow barrels getting dragged off the Orca in the movie Jaws and you get the picture. They are about two feet in diameter and three feet in height. I’ve searched high and low for the best prices and I’ve found them at Walmart.com for $51.55 each (a savings of $28.40).
You don’t even have to go into Walmart because they deliver. No driving through town with big-blue barrels hanging out of the trunk. You won’t be Mr. Obvious telling everyone “hey look at me I’m storing water.” Get them delivered.
The barrels arrive in boxes. Cut off the tops and save them. The boxes will be used to cover the barrels. This is a crucial step in helping you conceal from the outside world.
You now have food-grade, Emergency Essentials, FDA approved, BPA free, barrels concealed in boxes that will be tough for someone to steal. Unlike the barrels in Jaws, these will be full of water. Each gallon weighs 8-pounds. No one is going to be running out of your garage like a harpooned shark with 450 pounds on their back.
Store Water Storage Barrels on 2 x 4s
Make sure you store the barrels on two-by-fours if storing on cement. Cement leaches chemicals when it gets hot. Mine are on non-pressure treated two-by-fours because if cement leaches chemicals I don’t want to learn later that pressure-treated wood leaches chemicals. I don’t even know if this is scientifically possible, but having peace of mind and confidence in what I’m drinking plays a big part in all of this.
Now you’ve got a plan for intermediate-term water storage. Next up is how to prepare the barrel and the water for consumption.
Do Your Emergency Water Storage Containers Need Disinfecting?
Once you have your container(s), you want to make sure they are rinsed and disinfected before filling them up. Most come ready to go out of the box, but you want to make sure.
You can watch how to disinfect containers on YouTube. I like rinsing with plain old Clorox and letting them sit for about a half-hour. Then let them stand overnight before filling with water using an RV potable water hose.
Next, you want to treat the water for long-term storage. Clorox works well here too, as does grapefruit seed extract, and other solutions available on Amazon.
With Clorox, for example, you can Google how much to put in depending on the size of the container you’re using. For smaller containers, I like: You Must be 21 to Drink—two drops per one liter.
Imagine the “1” being the letter “L” to remember the one in “21” is the liter not the number of drops. Tricks are always good to have in your back pocket when you’re in the thick of things.
I was talking with friends in Houston and asked them what they do for emergency water storage. They have a 55-gallon barrel in their garage and treat it with grapefruit seed extract. They have a self-priming pump, which you can shop for online, which creates a siphon for easy access.
For more information on disinfecting water, see the CDC here.
Can You Siphon Out Your Water?
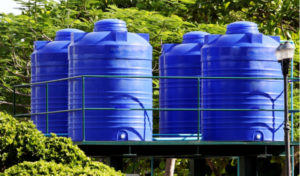
A siphon is one of the reasons I like storing in a garage or shed because of the ease in being able to cycle the water every five-years or so down your driveway or into your yard.
A siphon is impossible when storing in the basement because the barrel needs to be higher than the hose to create the flow. You’ll need an electric pump or lots of trips up and down the stairs with buckets (more on this in my next post tomorrow).
If you live in an area where temps dip below freezing and you’re storing water in the garage make sure to leave room for expansion from frozen water. You can wrap or insulate your barrels too.
Remember, for today, whatever you do decide to do is better than what you hope to get around to doing—hope is not a strategy.
You have all the tools you need to get your water storage needs in motion today. And along the way, you will find strategies that will work best for you. My guidelines will help you have water when you need it most and to find the peace of mind you deserve, today.
Water Purification
There are plenty of ways for you to store potable water. But how can you turn stored water into great tasting water?
I’ve learned that taste can be an issue if water has been sitting in a plastic container for perhaps five years. Who wants to drink water that tastes like plastic or Clorox? I don’t.
The best solution I’ve come up with is to use a water purifier. But, as one survivalist points out, storing treated water and then purifying it with a filter is like wearing a belt and suspenders, it’s redundant.
Redundancy is fine with Your Survival Guy.
When it comes to water purifiers, I like the idea of using a countertop model because I can pack it up and bring it with me if we need to go to another home, near or far.
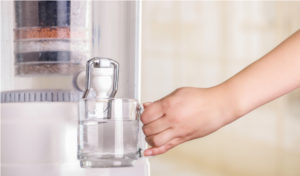
Countertop Water Purifiers
There’s a ton of information online about countertop water purifiers. I have the Big Berkey with black purification elements. I have also received recommendations for Alexapure and AquaTru.
The Big Berkey is a purifying veteran, having been to places where local drinking water can be as dangerous as AK-47 wielding insurgents. And if your long-term water source includes untreated raw water from lakes, streams, or stagnant ponds, they all become potable water with a Big Berkey.
According to Berkey’s website: This system removes pathogenic bacteria, viruses, cysts, and parasites entirely and extracts harmful chemicals such as herbicides, pesticides, VOCs, organic solvents, radon 222 and trihalomethanes. Hopefully, it keeps the “H” in H2O.
Don’t be put off by some of the negative reviews. This is an extremely competitive market as water purification has turned into a growth industry. Try your system out: prime the purification elements, make sure the seals are tight and test it.
Care for it just like you would any other valuable commodity and you will have great tasting drinking water when you need it. Even if it’s a belt and suspenders solution—I like both.
Good Karma
I’ve caught myself letting the water run needlessly while shaving, brushing my teeth and doing the dishes. For some reason, in addition to not wasting water, I feel good just turning it off. In a way, I’m hoping it will be good karma for when I really need water.
Believe me there’s something to this karma stuff. Feeling good about what you’re doing, like being careful with your water usage and emergency water storage makes you feel like you’re giving back in some small way. You know who’s mastered giving back to their community? The Mormons.
Learn from the Mormons
If you want to learn how to prepare, not only yourself and your direct family, and to be able to help your extended family, friends, and community—you want to get acquainted with how Mormons work within their Ward. One rule of thumb is to avoid the “hoarding” mentality. When we hoard we get into a mindset of “I’ve got mine” and “good luck to you.” It brings me back to karma. If you approach your preparation as a learning experience that you will share, I think we’ll all feel better about our preparations—more of us will be in a position of strength. Water storage and how you do it is a perfect example.
Your Method is the Best
As I’ve explained to you in the past about your preparations, whichever method you choose to use, whether it be water storage or building cash reserves—your method is the best method because it’s the action you’re taking. It’s what you have done. It’s not a wish or a hope, it’s your accomplishment.
I was talking with a client recently, a Mormon, about this water storage thing and how challenging it can be. We agreed, though, that once you start chipping away at it, it becomes part of your lifestyle—not hoarding—but saving and thinking about the future—thinking about your family and your community’s survival. “Saving that 2-liter bottle of pop (soda) is a great way to store water,” he told me. “And I’ve got a bad back so they’re easier for me to move around.” Great advice from someone that has extensive knowledge on this whole storage thing.
Emergency Water Storage Final Takeaways
When setting up your water storage system, you must make sure it’s the right one for you. That should take into account its volume, your home climate, the size of your family, the purity of the available water sources around you, the duration of any water emergency you may face, and any other factors affecting your personal situation.
Don’t let inertia hold you back. Survive and thrive by getting prepared for a water emergency today.
